Routing with qtVlm
Sommaire
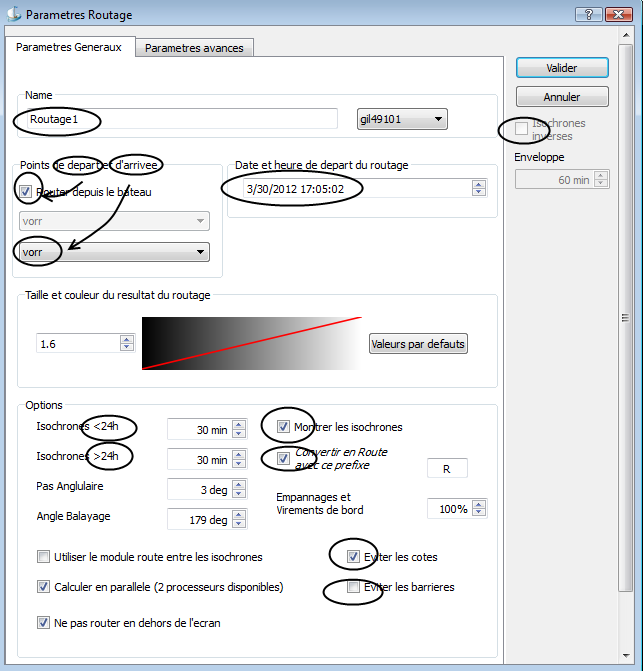
General parameters
Chose a name(by default routing1, 2, 3, etc.)
Choose if you want to route from the boat or from a free POI (i.e. not belonging to a route)
Choose the destination. Must be an existing free POI, not belonging to a route.
Choose a starting date and time
Options:
- Isochons duration (might be different for the first/last 24 hours),
- Convert to route.
- Do not route outside visible map (the routing module does not "see" coasts outside screen).
- Avoid barriers (see after).
- If the option "convert to route" has not been selected, you can after the calculation edit the routing (menu routing->edit a routing) and ask for the inversed isochrons, which means recalculating the routing from the arrival point and time backward to the start. Note that for this option to be available the isochron's duration must be the same for less and more than 24 hours. See after for more details on this and how to use it.
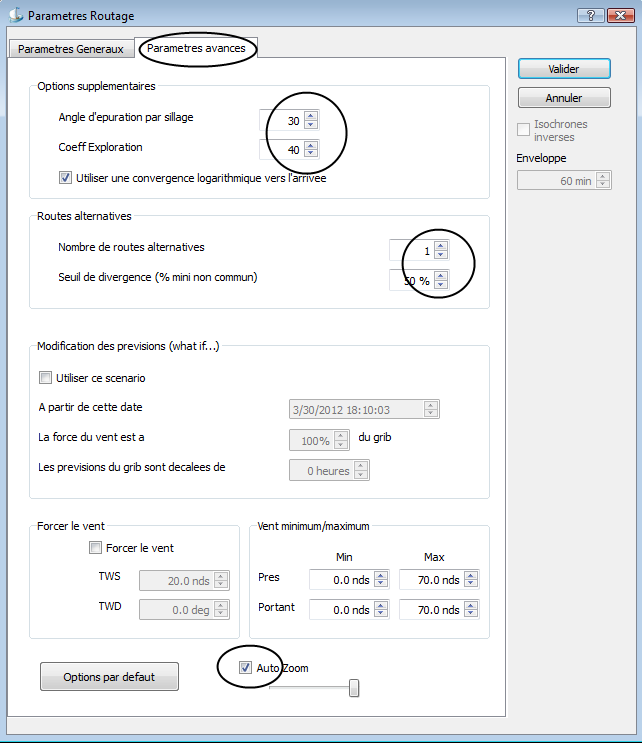
Advanced options
- Wake angle, exploration factor
- At each calculation loop, some possible routes are discarded, in order to limit the calculation time.
- The wake angle parameter will discard the points that are in the wake of more advanced points, while the exploration factor defines the number of extra points to keep.
- In other words, a smaller wake angle and a bigger exploration factor will result in more possibilities explored, but a longer calculation time.
- Alternate routes: This option will try to detect the main alternatives to the best route. It analyses all the points at 75% of the distance and will show the n routes which arrive faster, if their way is at least x % differents from each other (n and x are in advanced options).
- Minimum/maximum wind, upWind/downWind will force the routage to avoid these zones in the Grib.
- Auto Zoom allows you to fine tune the automatic zooming, depending on your screen geometry.
Validation
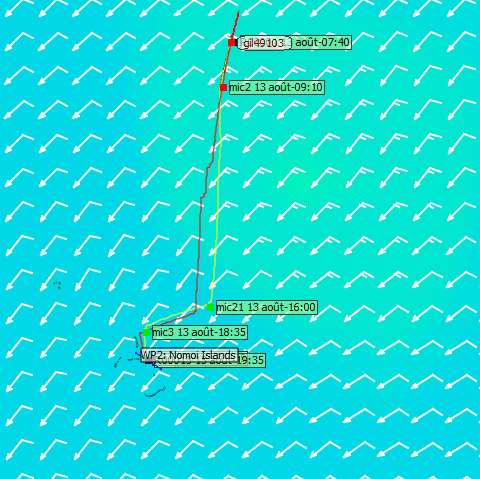
- If option 'Convert to route' has been checked, after the calculation the routing will be immediately converted to a route. Then you can eventually edit the route and simplify/optimize it.
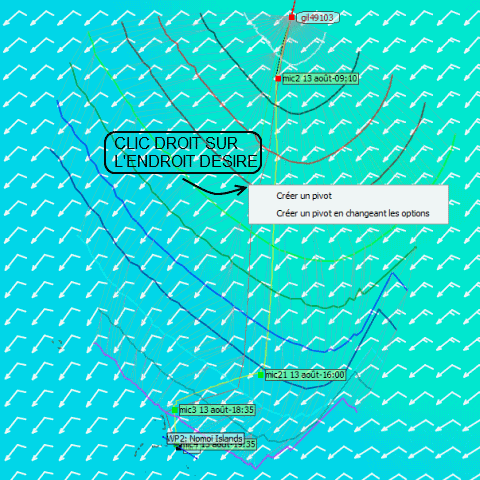
- Otherwise you can eventually create a pivot point, i.e. start a new routing from an isopoint. This can be useful to pass a gate for instance, or to study alternatives.
- then
Barriers and inversed isochrons
Use barriers
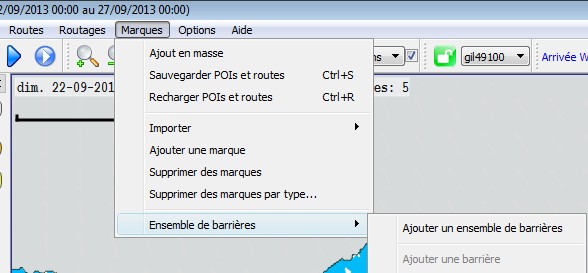
Firstly each barrier is embedded in a set, this allows multiple separate and / or more closed shapes traits combined. You can have as many as you want to set . And thus an associated set a boat depending on the race or during the race . In the same way if you have several boats in the race, one of the barriers can not be associated with the other ... To be taken into account when routing must do 2 things : - Associate the set to the boat (either via a right click on the boat or via a right click on a barrier set) - Enable the routing option on barriers So in practice to use barriers: - Marks menu => Set barrier => Add barrier set
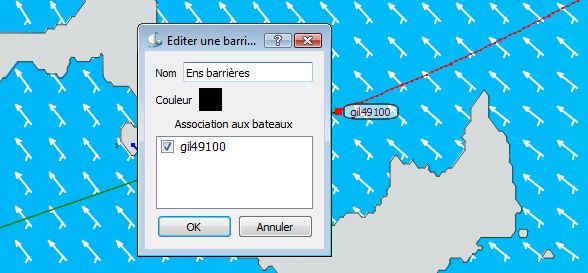
we will ask you the name of the set and the display color managed set (which will be the display of the color barrier )
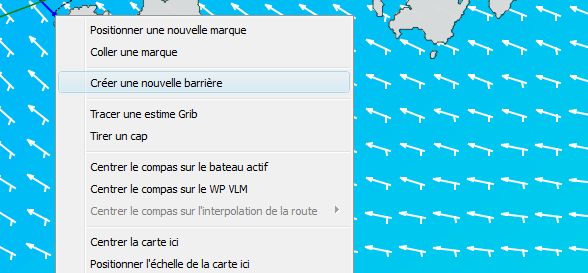
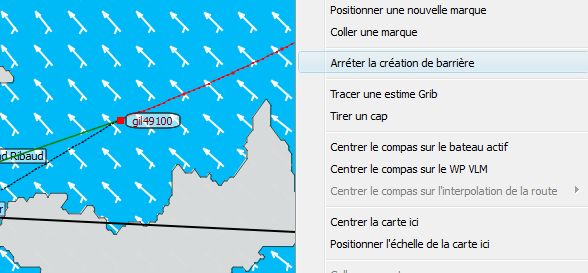
To avoid barriers to change in the use of qtVlm are locked with default, it must pass through the Marks menu => Set barrier => Allow edition to enable / disable the mod barriers. After creating a set, you default editing mode Use the toolbar button or right-click on the map + " Create a new barrier " to add a barrier set. if you have multiple set, qtvlm wonder how set add if you have gone through the tool bar : it then click on the map if you have gone through the right click, the first point is positioned right click endroi
Then you are adding fashion point and therefore can add points one after the other to stop : click on the toolbar button or ESC
to close a gate, two options: - Put the last point on the first - Right click on the gate and activate the " gate closed " option It is not possible to close a shape on an intermediate point ( for example a line from a vertex of a triangle ) to move a point : shift + click on the point and moving Finally you can: - Insert a point in an existing segment via a right click on the segment - Add points before or after the item First Prev latter via a right click on these points
Inversed Isochrons
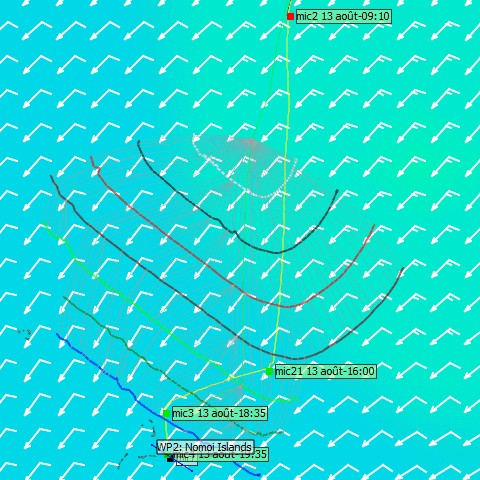
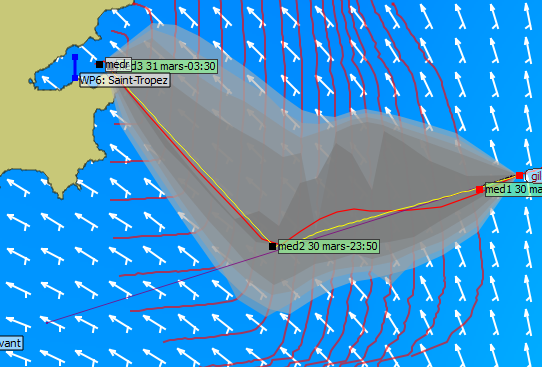
To calculate inversed isochrons, the module starts from the arrival point and date of the initial calculation and goes back to the start point. It inverses the wind direction (i.e. if the grib gives 150° it will calculate with 30°) and proceeds normally otherwise. In other words, instead of calculating where it can go, it calculates where it can come from.
The interest of this is to compare regular isochrons with their inversed. For instance if we determine their crossing points one can deduct an envelope which correspond to the route that arrive inside one isochron duration. By interpolating around this the module is able to calculate any kind of envelope, for instance 1/3, 1/2, etc of the isochron duration.
One can also make various deductions by looking at the places where isochrons and their inversed are not tangents or have differents shapes. It is also very useful to see which other boats are late or in advance.
To get inversed isochrons, you need:
1) That the routing is done, and not yet converted to route
2) That isochrons duration for <24h et >24h are identical,
3) Then you have to edit the routing, and ask for inversed isochrons by checking the option.
By default the size of the envelope (the sensitivity zone) is equal to the isochron duration, you can eventually reduce it, The places where the envelope is thiner hold more uncertainty since the passage in the grib is smaller and might not be there in the next gribs.
